Sewing jeans can feel a bit intimidating at times, but luckily there are some very simple tricks and techniques that will make a big difference. So here are 10 of my favourite jeans sewing tips and don’t forget to check out my book Sewing Jeans to learn even more!
1. Increase the needle tension when using heavy thread
First jeans sewing tip: both the thickness of the thread and the fabric affects the tension required, so always do a sample before topstitching your jeans.

- In this example, the needle tension is too loose, with the sign being the loops that are formed on the underside.
- Instead, aim for tension with no visible knots on either side. In this example I had to crank up the tension to 8 out of 10 on my machine.
A pretty big difference right? There is no magic number, however, the fabric, thread type and even your machine will all affect the result. So always make test samples before stitching your precious jeans.
This post contains Amazon affiliate links, meaning that a commission is earned from qualifying purchases.

2. Use regular thread in the bobbin
Have you ever used heavy thread in the bobbin only to end up with a tangled mess with wonky tension? This is perfectly normal when sewing on a regular household sewing machine. They are not optimised for heavy bobbin thread and will thus underperform.
So you can save yourself a lot of headaches and just use regular sewing machine thread in the bobbin. Which will pretty much guarantee perfect topstitching every time!
If you still want to use heavy thread in the bobbin, you either have to tamper with the bobbin tension or check if your machine brand has a special bobbin for heavy thread. But after spending (wasting?) so much time experimenting, I’ve personally decided to just stick with regular thread (like in the photo above). I think it looks great too!

Read more: 7 Time-Saving Tips For Sewing Jeans
3. Use a paper press template to shape the back pockets
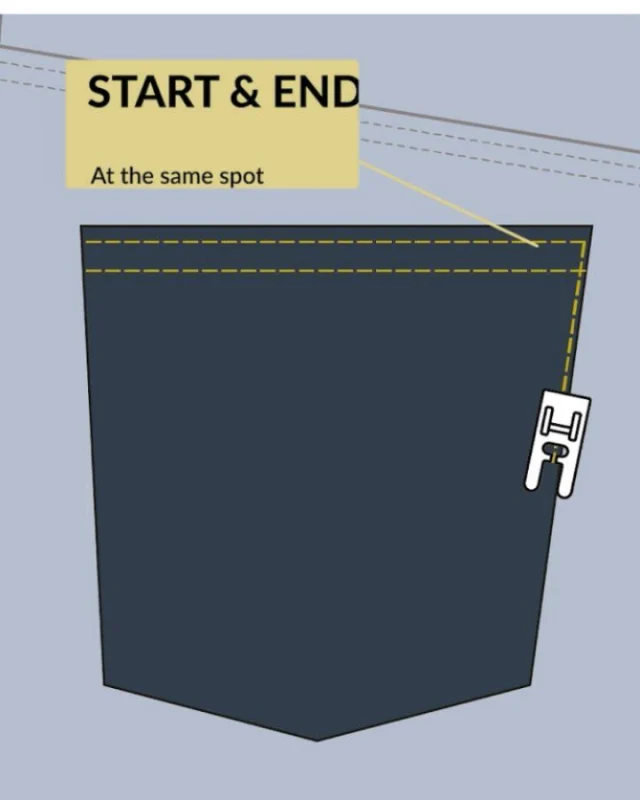
When sewing back pockets on jeans, use a paper press template the size of the finished pocket to shape it. Just press in the seam allowances around the template and you’ll get beautifully shaped pockets with razor-sharp corners.
For more ideas on sewing jeans pockets, check out my video tutorial or blog tutorial to learn more.
And if you get my Sewing Jeans book, you’ll get 5 different back pocket pattern designs and corresponding templates, which makes it even easier for you!

4. Use a height compensation tool
When topstitching over bulky layers, such as where the several seams intersect, insert a hump-jumper or another height compensation tool to level the presser foot. This will ensure even feeding and prevent skipped stitches.
3 types of level tools
- Hump-Jumper/Button tool
- Jean-A-Ma-Jig
- Bernina Height Compensation Tool (has three levels)
Some links above are Amazon affiliate links meaning I get a commission for qualifying purchases.

5. Stitch a folding line for a beautiful inner waistband
When sewing jeans waistbands, stitch a folding line on the inside of the waistband and press along it to ensure an even and razor-sharp fold, which will make the stitching the waistband much easier, and it will look better too.

Learn more: How to Sew a Jeans Waistband
6. Baste or tape the waistband
Another sewing jeans tip for the waistbands is to either baste or use water-soluble double-sided tape on the inner waistband to keep it in place when topstitching.
If you are using wonder tape, just add it onto the seam allowances and finger press it in place.
Get Wonder Tape
- Prym Wonder Tape
- Dritz Wonder Tape (should be the same product as Prym)
(Amazon affiliate links)

7. Use a presser foot with an edge guide when topstitching
This will make it way easier to stitch evenly. Align the blade guide along the edge and then stitch. Most, if not all sewing machine brands, will have a version of this foot.

8. Use two spools of regular thread when topstitching
If you don’t have heavy topstitching thread in a colour you like, just use two spools of regular thread, and thread both strands in the needle. If your sewing machine only has one pin, wind thread on two bobbin spools and stack them on top of each other.

The finished look will rival any heavy thread and if you are feeling adventurous, why not try three spools of thread, like I did on this back pocket stitch:

BTW you’ll find tutorials for how to decorative stitching on back pockets (+ designs templates) in my Sewing Jeans book.

9. Use the outer edge of the presser foot for the second row
Use the outer foot lip as your guide when stitching the second row of topstitching. That lip is usually 5 mm wide which is a good space for the second row of stitching.

10. Create a reusable zipper topstitching template
The final jeans sewing tip is to create a reusable topstitching zipper template out of heavier card stock, so you’ll always have it ready when sewing jeans. You can also attach it onto the fabric and stitch along it, which removes the need for tracing.
If you don’t want to make your own, I’ve created three different versions that you can download for free.
Hope you enjoyed these sewing jeans tips and don’t forget to check out my Sewing Jeans book and all my other Sewing Jeans Tutorial resources to learn even more.
Want to see all these jeans sewing tips in action? Then check out this video!

This post contains Amazon affiliate links, meaning that a commission is earned from qualifying purchases.


 I used an old shirt for
 Pattern is from @burda_sty